
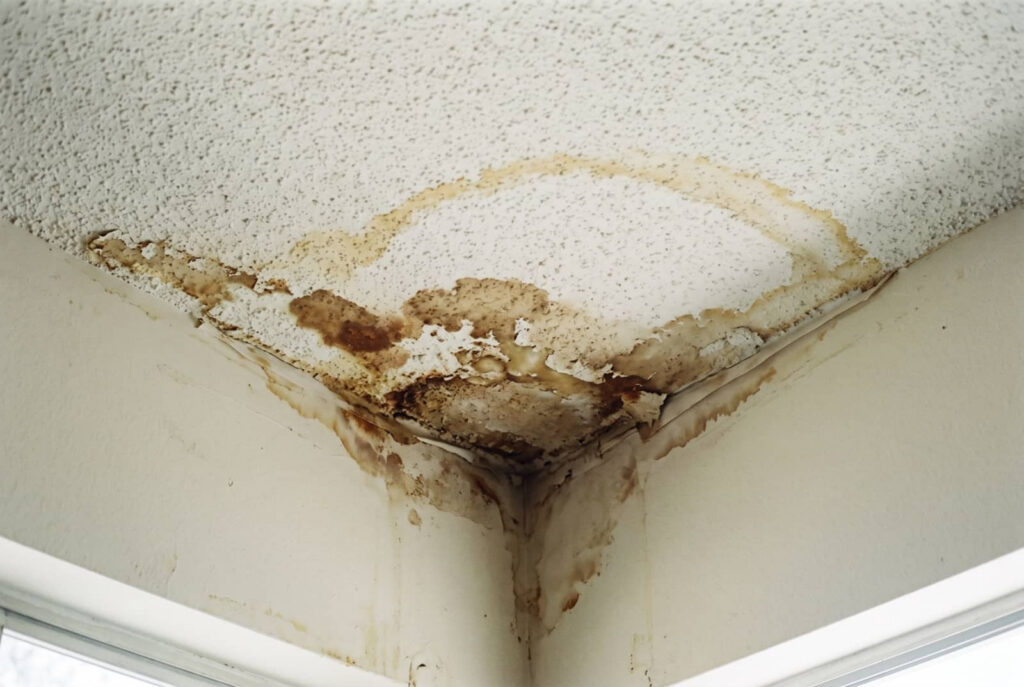
You spot a brown ceiling stain after a shower leak, and you know the problem runs deeper than the paint. You need to find the source, stop the spread, dry hidden moisture, and remove damaged material before mold can take hold. Then you can repair the ceiling, match the finish, and reduce the chance of another leak. What happens next determines whether the fix lasts or fails.
Key Takeaways
- Find the leak source first by checking roof, plumbing, HVAC penetrations, and attic or crawl space for stains, damp insulation, and active drips.
- Stop further damage by shutting off nearby power, protecting belongings, and containing runoff with buckets, towels, or plastic sheeting.
- Dry the area thoroughly with airflow, dehumidifiers, and moisture-meter checks to map hidden wet zones before repairs.
- Remove all damaged drywall, insulation, and compromised materials, then inspect framing and sheathing for moisture or structural damage.
- Finish with proper patching, seam sealing, texture matching, priming, and repainting, then fix the underlying water source to prevent recurrence.
Find the Leak Before You Repair the Ceiling
Before you repair the ceiling, you need to find the leak source and stop it at the origin.
In ceiling water damage repair, you’ll inspect the roof, plumbing lines, fixtures, and HVAC penetrations with a flashlight and moisture meter. Trace staining patterns to the highest point, then check for active drips, softened drywall, or damp insulation above the damage.
If you can safely access the attic or crawl space, look for wet framing and mineral tracks. Mark each suspect area so you don’t miss a hidden entry point.
You’re not fixing this alone; a careful, methodical search helps you protect your home and guide the repair with confidence.
Once you identify the source, you can move forward knowing the structure’s been assessed correctly.
Stop the Water Damage From Spreading
Once you’ve found the source, act fast to limit the spread. Shut off the affected circuit if water’s near fixtures, and move furniture, rugs, and electronics out of the drip zone.
Place buckets, towels, or plastic sheeting under active leaks to catch runoff and protect nearby finishes. If the ceiling is sagging, don’t puncture it unless you’ve confirmed it’s safe; instead, contain the area and keep people clear.
Open the room below only as needed so you can monitor changes without stirring up damage. Mark the wet perimeter with painter’s tape, then watch for expansion.
Your quick, steady response helps the repair stay localized and keeps your space safer. You’re not just reacting—you’re controlling the loss and protecting the room you share.
Dry Moisture Behind the Ceiling
You need to locate hidden moisture behind the ceiling with a moisture meter or infrared inspection so you can target the affected area accurately.
Ventilate the ceiling cavity by opening access points and improving airflow to reduce trapped humidity.
Then use dehumidifiers quickly to lower moisture levels and help prevent further material degradation.
Locate Hidden Moisture
Hidden moisture often spreads beyond the visible stain, so you’ll need to map the full wet area before any ceiling repair begins. You can use a moisture meter to compare the damaged section with nearby dry framing and drywall.
Read the ceiling in a grid pattern, and mark every elevated reading so you don’t miss pockets trapped behind paint or joint compound. Check around fasteners, seams, light fixtures, and wall intersections, where water commonly migrates.
If the meter shows inconsistent results, test from multiple angles and verify with a small inspection opening. You’re not guessing here; you’re building a clear moisture profile that guides safe repair.
When you identify all affected zones, you can move forward with confidence, protect sound materials, and restore your space as a team.
Ventilate Affected Ceiling
After you’ve mapped the wet area, ventilate the ceiling cavity so trapped moisture can escape instead of lingering behind the drywall.
You’ll create airflow paths by opening access points near the damp section and, if needed, removing small drywall strips along the edge. Keep the space exposed enough for air to move through the cavity, but don’t damage sound material.
Check that insulation isn’t blocking circulation; wet insulation can slow drying and may need careful repositioning. If you can reach both sides of the affected bay, encourage cross-ventilation so humid air leaves efficiently.
Keep the room comfortable and quiet, and monitor the surface for cooler, darker patches that signal retained moisture.
You’re restoring the structure one controlled step at a time, and steady ventilation helps your ceiling join the dry, stable condition you want.
Use Dehumidifiers Quickly
Bring in dehumidifiers as soon as the ceiling cavity is open enough for airflow, because trapped moisture can keep spreading into drywall, insulation, and framing. You’ll lower humidity faster, limit swelling, and reduce the risk of mold growth.
Set the unit close to the wet area, close doors and windows, and let it run continuously until readings drop to normal. Check the cavity with a moisture meter, not just your hand.
- Empty the tank often so drying doesn’t pause.
- Aim for steady airflow across exposed surfaces.
- Recheck hidden areas after 24 hours.
If you act quickly, you’re protecting the structure and joining the same careful routine pros use. That steady response helps your ceiling dry evenly and keeps the repair path clear.
Remove Damaged Drywall and Insulation
You’ll need to cut out all damaged drywall so you can access the full affected area and prevent trapped moisture from spreading.
Remove any wet insulation and dispose of it properly, since saturated material can hold hidden water and support mold growth.
Once the cavity is exposed, inspect the framing and sheathing for residual moisture, staining, or structural damage before you close it back up.
Damaged Drywall Removal
Cut away the damaged drywall and remove any wet insulation once you’ve confirmed the leak is stopped and the area is safe to open. You’ll expose the full extent of the ceiling damage and create a clean edge for later patching.
Use a utility knife, pry bar, and dust control, and work methodically so you don’t crack sound material. Keep cuts square and slightly beyond visible staining to reach hidden soft spots.
- Wear eye protection and a respirator.
- Support loose sections before they fall.
- Inspect framing for discoloration or sagging.
As you clear the opening, you’ll help the cavity dry faster and reduce the chance of trapped moisture. Stay steady; you’re making the repair safer and more manageable for your home.
Wet Insulation Disposal
Scoop out the wet insulation as soon as the drywall is open, bag it promptly, and seal the bags so moisture and debris don’t spread through the work area.
You’ll want to use a respirator, gloves, and eye protection while you remove every saturated section by hand or with a dustpan.
Keep the removal path tight and controlled so you don’t disturb dry framing or make cleanup harder for your crew.
Double-bag the waste if it’s heavy or fibrous, then carry it out carefully to avoid tearing.
Once the cavity is clear, wipe the exposed edges of the drywall opening and nearby framing to reduce residue.
This step helps you protect the structure, keep the jobsite organized, and stay aligned with the restoration team’s next move.
Exposed Cavity Inspection
With the drywall and saturated insulation removed, inspect the exposed cavity for hidden damage, lingering moisture, and signs of mold or stained framing.
You’ll want to check every stud, joist, and fastener for softness, swelling, or corrosion. Use a moisture meter to confirm the cavity is dry before you close it up.
If you spot discoloration, clean it promptly and let the area dry fully. Look for gaps around wiring, pipes, and seams that could trap water or block airflow.
- Confirm framing is sound and straight
- Verify no damp insulation remains nearby
- Photograph conditions for your records
This careful inspection helps you protect your home and move forward with confidence.
Fix the Ceiling Damage
Once the area is fully dry, you can repair the ceiling damage by removing any loose, sagging, or stained material and replacing it with new drywall or plaster.
Cut back to solid edges so your patch bonds cleanly and won’t fail later. If you’re working with drywall, measure the opening, fit a matching piece, and secure it to framing or backing strips with drywall screws.
If plaster was damaged, apply a compatible base material and reinforce larger repairs with mesh. Keep all fasteners slightly recessed, and seal seams with joint compound or patching plaster.
Let each layer cure before adding the next. By working methodically, you restore strength, protect the structure, and bring your ceiling back to the standard your home deserves.
Blend Texture, Paint, and Finish
After the repair has cured, you can blend the patched area into the surrounding ceiling by matching the existing texture as closely as possible.
Use a spray hopper, brush, or knockdown knife, and test on scrap until the pattern feels consistent. Once the texture dries, prime the entire repair zone so the paint absorbs evenly and the patch doesn’t flash.
Then apply ceiling paint in thin, overlapping coats, feathering each edge beyond the repair. A low-sheen finish usually hides changes best.
- You’ll notice the surface look more unified.
- You can work methodically and trust the process.
- You’ll help the room feel cared for and complete.
Inspect under angled light, then touch up any mismatch.
Prevent Future Ceiling Leaks
To prevent future ceiling leaks, you need to address the water source, not just the visible damage. Inspect roof flashing, plumbing joints, HVAC condensate lines, and attic ventilation for failure points.
Replace cracked sealant, corroded fittings, and worn shingles before they reopen the path for water. After storms, check your ceiling and attic for staining, damp insulation, or musty odors, because early signs let you act fast.
Keep gutters clear and downspouts extended so runoff moves away from your home. If you live in a shared building, document issues and coordinate with maintenance so your space stays protected.
When you maintain these systems, you’re not just fixing a room—you’re helping your home stay sound, dry, and ready for you and your family.
Frequently Asked Questions
Can Ceiling Water Damage Cause Mold Inside Walls?
Yes, ceiling water damage can cause mold inside walls when you trap moisture there. You should inspect promptly, dry hidden cavities, and fix the leak fast; you’ll protect your home and your people.
How Long Does Ceiling Water Damage Restoration Usually Take?
Usually, you’ll need 2 to 7 days; minor damage dries faster, while hidden moisture and repairs stretch the timeline. You’ll see dehumidifiers humming, crews testing damp framing, and your ceiling steadily returning to normal.
Will Insurance Cover Ceiling Water Damage Repairs?
Usually, yes—if the damage came from a sudden, covered event. You’ll want to document the leak, call your insurer quickly, and keep receipts. Exclusions, like neglect or long-term seepage, can limit your claim.
When Should I Call a Professional Water Damage Contractor?
You should call a professional water damage contractor when you see active leaks, sagging drywall, spreading stains, musty odors, or hidden moisture. They’ll find the source, dry structure, and restore your space safely and quickly.
Can I Stay Home While Ceiling Repairs Are Being Completed?
Yes, you can often stay home, but you’ll need to balance convenience with safety. If crews are drying, cutting, or repairing ceilings, keep rooms ventilated, avoid active work zones, and follow your contractor’s guidance closely.
Review
When you finish ceiling water damage repair, think of it like stopping a slow leak in a boat before it sinks. Repeat ceiling repairs come from missed moisture, not visible stains. You’ve already found the leak, dried the cavity, removed damaged materials, and restored the finish. Now keep inspecting plumbing, roofing, and attic insulation so small drips don’t become major damage again.