After a fire, you secure the site, you document the damage, and you protect your health. Before you step inside, you’ll need official clearance and a careful assessment of structural hazards, smoke contamination, and hidden water damage. From there, cleanup becomes a sequence of controlled actions that can prevent further loss, but the real challenge is knowing what to save, what to replace, and when specialized restoration support becomes essential.
Key Takeaways
- Ensure the property is safe before re-entering, and check for structural damage, gas leaks, and electrical hazards.
- Document all fire damage with photos, notes, and an inventory for your insurance claim.
- Hire a licensed fire restoration team to handle cleanup, soot removal, odor control, and hidden damage.
- Extract water and dry affected areas quickly to prevent mold, warping, and further structural deterioration.
- Repair damaged materials with code-compliant replacements and address any remaining smoke or moisture issues.
What to Do Right After a Fire?
Right after a fire, you should make safety your first priority: wait for official clearance before re-entering, and avoid any areas with structural damage, smoke, or weakened utilities.
Then contact your insurer, document visible damage with photos, and save receipts for emergency costs.
Start fire damage restoration by notifying a licensed restoration team, because fast action helps limit smoke, soot, odor, and water-related deterioration.
If authorities allow brief access, gather essential documents, medications, chargers, and identification, but don’t touch contaminated items unless you’re instructed to do so.
Stay connected with your family and neighbors; recovery goes easier when you’re not handling it alone.
Keep communication clear, follow professional guidance, and let trained experts stabilize the property so you can move forward with confidence.
Make Your Home Safe Before Entering
Before you step back inside, make sure the property is officially cleared and that you’ve checked for immediate hazards from the outside.
Confirm the fire department or utilities team has shut off gas, electricity, and water if needed. Look for sagging roofs, cracked walls, broken glass, and unstable steps before you approach the door.
If you smell gas, hear hissing, or see smoke, stay out and call emergency services right away.
Wear sturdy shoes, long sleeves, gloves, and a respirator if you must enter. Open the door slowly, stand to one side, and watch for heat, debris, or weakened flooring.
Move carefully, keep a charged flashlight with you, and enter only with another adult nearby. You’re protecting your home and your people together.
Document Fire Damage for Insurance Claims
Once the property is safe to enter, you should document every visible sign of fire, smoke, soot, and water damage before cleanup begins. Use your phone or camera to capture wide shots of each room, then take close-ups of damaged walls, ceilings, contents, wiring, and structural surfaces.
Record dates, times, locations, and brief notes so your claim stays organized and verifiable. Keep damaged items in place when possible, because insurers often need context to confirm loss.
Create a simple inventory with estimated age, brand, model, and purchase value for each item. Back up photos and receipts to cloud storage or a drive.
If you feel overwhelmed, lean on your support network and your adjuster; careful documentation helps you recover faster and protects the claim you deserve.
Begin Fire Damage Cleanup Safely
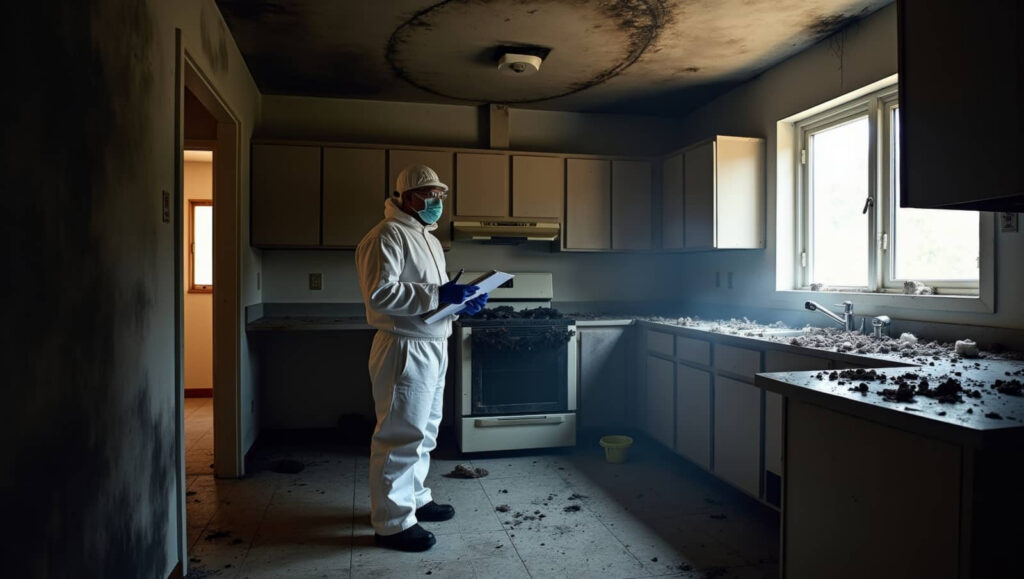
Before you start cleanup, make sure the structure is safe by checking for weakened floors, damaged ceilings, and exposed utilities.
Wear protective gear, including gloves, eye protection, and a respirator, to reduce exposure to soot and hazardous residue.
Then ventilate the area by opening windows and using fans if it’s safe to do so, which helps clear smoke and improve air quality.
Ensure Structural Safety
If the fire has been extinguished, you still need to confirm the structure is safe before you begin cleanup. Check for sagging ceilings, cracked walls, warped floors, and damaged stairs, because hidden failure can cause collapse.
Stay out of rooms with heavy charring, strong smoke damage, or standing water until a qualified inspector clears them. Shut off gas, electricity, and water only if you can do so safely, and avoid touching exposed wiring or compromised appliances.
If you notice shifting, popping, or unusual odors, leave immediately and call your utility provider or fire restoration professional.
When you verify the building’s frame is stable, you protect everyone involved and create a safer path forward. You’re not alone in this step; careful assessment helps your recovery team work with confidence.
Wear Protective Gear
Put on the right protective gear before you touch any fire-damaged materials. You’ll need a fitted respirator rated for soot and dust, safety goggles, heavy gloves, long sleeves, long pants, and sturdy boots.
If debris is unstable, add a hard hat and knee protection. This gear helps shield you from ash, sharp fragments, and irritating residues that can linger after a fire.
Check each item for tears, loose straps, or poor fit before you start, and replace anything compromised. Keep a clean set ready so you’re not tempted to work unprotected.
When you suit up correctly, you join the recovery process with confidence, protect your health, and make every cleanup step safer for everyone in the home.
Ventilate The Area
Open windows and exterior doors as soon as it’s safe to do so to flush out smoke, soot, and lingering odors.
If local conditions allow, create cross-ventilation by opening opposite openings and using fans to move contaminated air outdoors, not through the house.
Keep HVAC systems off until a technician confirms they’re clean; otherwise, you can spread residue into every room.
Check that utility lines, structural damage, and air quality won’t put your team at risk before you start.
If you smell strong chemicals or see heavy soot, step back and call a restoration pro.
Good airflow helps your cleanup crew breathe easier, protects materials, and sets you up for the next recovery steps with confidence.
Remove Smoke, Soot, and Odors
You’ll need to remove smoke residue from every affected surface using the right cleaning method for the material, because soot can stain, corrode, and spread if you scrub it incorrectly.
After cleanup, you should neutralize lingering odors with targeted treatments such as HEPA filtration, thermal fogging, or odor-absorbing agents.
These steps won’t just improve air quality—they’ll help restore the space safely and prevent hidden smoke damage from persisting.
Smoke Residue Cleanup
Smoke residue cleanup starts with removing loose soot and addressing lingering odors before they settle deeper into surfaces and materials. You’ll protect finishes by working top to bottom and choosing the right method for each room. Dry soot lifts with a HEPA vacuum; oily residue needs careful wiping so you don’t smear it.
- Ceiling corners, where fine black dust clings
- Wall edges, streaked after heat and smoke
- Cabinet fronts, coated in a dull film
- Floor seams, trapping gritty particles
Use clean microfiber cloths, change them often, and isolate contaminated items to stop cross-contamination.
You’re not doing this alone; a systematic cleanup restores control, reduces health risks, and brings your space back to a livable condition with confidence.
Odor Neutralization Methods
Odor neutralization works best after you’ve removed soot and dried affected materials, because trapped smoke compounds keep off-gassing until you interrupt them.
You should then target the source with HEPA air scrubbing, activated carbon filtration, and thorough ventilation to exchange contaminated air.
Technicians may apply thermal fogging or hydroxyl treatment to break down odor molecules in hard-to-reach cavities, while sealants can lock residual smells inside porous framing.
You’ll also need laundering, deep cleaning, and removal of unsalvageable contents to prevent recontamination.
Test each area after treatment, because hidden soot in ductwork, insulation, and voids can keep odors returning.
When you follow this process, you’re not alone; you’re rebuilding a clean, safe home with proven methods and steady support.
Fix Water Damage From Firefighting
After the fire is out, address water damage from firefighting quickly to prevent secondary deterioration and mold growth. You should ventilate the space, shut off wet circuits, and remove standing water with pumps or extraction tools.
Then dry hidden cavities with air movers and dehumidifiers so moisture doesn’t linger behind walls. Our restoration team follows a disciplined process that helps you regain control fast and feel supported.
- Inspect soaked floors, ceilings, and framing.
- Extract pooled water from carpets and subfloors.
- Position drying equipment for steady airflow.
- Monitor moisture until readings return to safe levels.
You don’t need to face the damage alone; prompt, methodical drying protects the structure, stabilizes conditions, and sets up the next recovery steps.
Decide What Fire-Damaged Items Can Be Saved
You’ll need to evaluate each fire-damaged item against clear salvageable-item criteria, including material type, soot exposure, odor retention, and moisture damage.
Check for structural damage first, because compromised framing, cabinetry, and fixtures may no longer be safe to restore.
When an item can’t be cleaned, stabilized, or verified as sound, replace it; otherwise, restore it with the right remediation method.
Salvageable Item Criteria
To determine what fire-damaged items can be saved, inspect each piece for structural soundness, heat exposure, smoke and soot penetration, and water damage from suppression efforts.
You’ll make the best call when you compare cost, safety, and restoration potential. Keep these criteria in mind:
- Solid core material with no warping, crumbling, or deep charring.
- Limited smoke absorption, so odors and residue can be cleaned effectively.
- Surface-only soot, not embedded contamination in fabrics, paper, or electronics.
- Dryable water damage, where contents can be stabilized without mold risk.
If an item passes most checks, it may be a strong candidate for cleaning and restoration.
You’re not deciding alone; you’re choosing what can safely return to your space and support your recovery.
Structural Damage Assessment
Once you’ve checked what might be salvageable, the next step is to assess the item’s structural damage. You’ll look for warping, cracking, sagging, splitting, and loss of load-bearing strength.
Tap and probe wood, metal, and composites for hidden weakness, and inspect joints, fasteners, and support points for heat distortion. If an item has softened, buckled, or separated at its core, its structure may no longer be reliable.
You should also note charring depth and any evidence of water-induced swelling, since firefighting can worsen instability. Document each finding with photos and clear notes so your restoration team can make consistent decisions.
When you evaluate damage this carefully, you’re protecting your space and joining a community of homeowners who restore safely, methodically, and with confidence.
Replace Or Restore
How do you decide what stays and what goes after fire damage? You inspect each item for heat warping, soot penetration, corrosion, and odor retention. If materials are structurally sound and can be professionally cleaned, restoration may work.
Porous items often trap smoke and may need replacement. Trust your restorer’s assessment, because safety and indoor air quality come first.
- Check framing, wiring, and insulation for hidden damage.
- Evaluate cabinets, furniture, and textiles for charring or odor.
- Salvage metal, glass, and sealed surfaces when cleaning succeeds.
- Replace items that keep shedding soot or smell after treatment.
You’re not making this decision alone. With the right team, you can protect what matters, reduce risk, and rebuild a home that feels like yours again.
Repair Fire-Damaged Walls, Floors, and Roofs
After the fire is out and the site is safe, you can begin repairing fire-damaged walls, floors, and roofs by evaluating structural integrity and removing any materials that can’t be salvaged.
You should inspect framing, joists, sheathing, and roof trusses for warping, cracking, or loss of load-bearing strength. Replace compromised drywall, subflooring, insulation, and roofing components with code-compliant materials that match the original assembly.
Use proper fastening, fire-rated sealants, and accurate alignment to restore stability and finish quality. If you find hidden damage, open affected sections so you can verify the full repair scope.
Keep every work area organized and clearly marked so your crew can move confidently and safely.
When you rebuild methodically, you protect your home and help your space feel whole again.
Prevent Mold and Lingering Odors
As you remove water, soot, and debris, dry the affected areas quickly to stop mold from taking hold and to prevent odors from settling into porous materials.
Use fans, dehumidifiers, and steady airflow to pull moisture from framing, subfloors, and insulation. You’ll protect your home’s structure and keep your space feeling safe and familiar.
Focus on these steps:
- Open cavities and expose hidden damp spots.
- Wipe hard surfaces with approved cleaners.
- Bag and remove smoke-soaked fabrics, padding, and paper.
- Run drying equipment until materials reach normal moisture levels.
Check closets, vents, and wall edges for trapped dampness. Seal clean surfaces only after they’re fully dry.
When you act promptly, you help your home recover cleanly and keep your household comfortable, connected, and confident again.
When to Call a Fire Restoration Company
Even with quick drying and careful cleanup, fire damage can leave hidden hazards that need professional attention.
Call a fire restoration company when smoke has reached HVAC ducts, soot coats walls or electronics, or water from firefighting has soaked framing, insulation, or flooring.
You should also bring in experts if odors persist, structural materials feel weakened, or you see discoloration after wiping surfaces.
Professionals use thermal drying, HEPA filtration, deodorization, and damage mapping to stop hidden corrosion and microbial growth.
They can also coordinate with your insurer and document losses accurately.
When you work with trained restorers, you protect your home’s safety and join a process designed to bring your space back to normal with confidence.
Frequently Asked Questions
How Long Does Fire Damage Restoration Usually Take?
It usually takes you days to several months, depending on damage severity, smoke, water, and repairs. You’ll move faster with prompt assessment, professional cleanup, and coordinated reconstruction, and you can expect clear updates throughout.
Does Homeowners Insurance Cover Temporary Housing After a Fire?
Yes, your homeowners insurance often covers temporary housing after a fire if your policy includes loss of use coverage. You’ll want to confirm limits, keep receipts, and contact your insurer immediately to start reimbursement.
Can I Stay in My Home During Restoration Work?
You can, but only if the area’s safe and contractors isolate dust, smoke, and structural hazards. If you’ve got lingering odors, water damage, or electrical issues, you shouldn’t stay until professionals clear it.
How Much Does Professional Fire Restoration Cost?
Professional fire restoration typically costs you $3,000–$50,000, depending on damage severity, smoke, water, and repairs. You’ll get a safer, faster recovery when you hire certified pros who assess, clean, deodorize, and rebuild efficiently.
Final Thoughts
As you move through recovery, every decision you make shapes what comes next. Secure the structure, document the loss, and clear the damage before hidden hazards spread. Smoke, soot, and moisture can keep working long after the flames are out. If you act quickly and bring in the right restoration team, you can stop further destruction and rebuild with confidence. The next step isn’t just cleanup—it’s the moment your home starts to come back.