
When water enters your property, you need to act fast to limit structural damage, mold growth, and costly repairs. You’ll learn how to spot the source, stop the spread, and start restoration before the problem worsens. From initial cleanup to full repairs, each step matters more than you might think, especially when hidden moisture stays behind. The key question is how much damage you can prevent before it turns into something bigger.
Key Takeaways
- Water damage restoration restores homes or businesses by removing water, drying materials, cleaning surfaces, and repairing damaged structures.
- Act immediately by stopping the water source, shutting off electricity in wet areas, and documenting damage before cleanup begins.
- Restoration professionals inspect the property, extract standing water, dry hidden spaces, and monitor moisture daily to prevent further damage.
- Common repairs include replacing saturated drywall, flooring, and insulation, plus fixing framing, subfloors, cabinets, and baseboards.
- Prevent future damage with regular plumbing, roof, and gutter checks, leak sensors, sump pump testing, and pipe insulation.
What Is Water Damage Restoration?
Water damage restoration is the process of cleaning up, drying out, and repairing a property after water intrusion from leaks, floods, burst pipes, or similar events.
You use water damage restoration to return your home or business to a safe, usable condition while limiting further deterioration.
Professionals assess affected materials, remove damaged contents, control moisture, and restore structures with specialized equipment and proven methods.
This work can include drying framing, treating surfaces, and repairing walls, flooring, and insulation.
When you understand the process, you’re better prepared to protect your space and join a community of property owners who act quickly and confidently.
Water damage restoration combines technical skill with practical care, so you don’t have to face damage alone.
First Steps After Water Damage
Act quickly after a leak, flood, or burst pipe to limit damage and make cleanup safer.
Shut off the water source and electricity in wet areas if you can do so safely. Move people, pets, and valuables out of harm’s way.
Document visible damage with photos before you touch anything, then remove soaked rugs, paper, and loose items to slow deterioration.
Open windows for ventilation if weather allows, and place fans only after you confirm the area is safe.
If sewage, contaminated water, or structural sagging is present, stay out and call professionals right away.
You’re not dealing with this alone; many property owners face the same urgent steps. A calm, organized response helps protect your home and supports faster recovery.
The Water Damage Restoration Process
Once the immediate hazards are under control, the restoration process moves into assessment, water removal, drying, cleaning, and repairs.
You’ll start with a detailed inspection to identify damage, moisture levels, and affected materials so the crew can build the right plan.
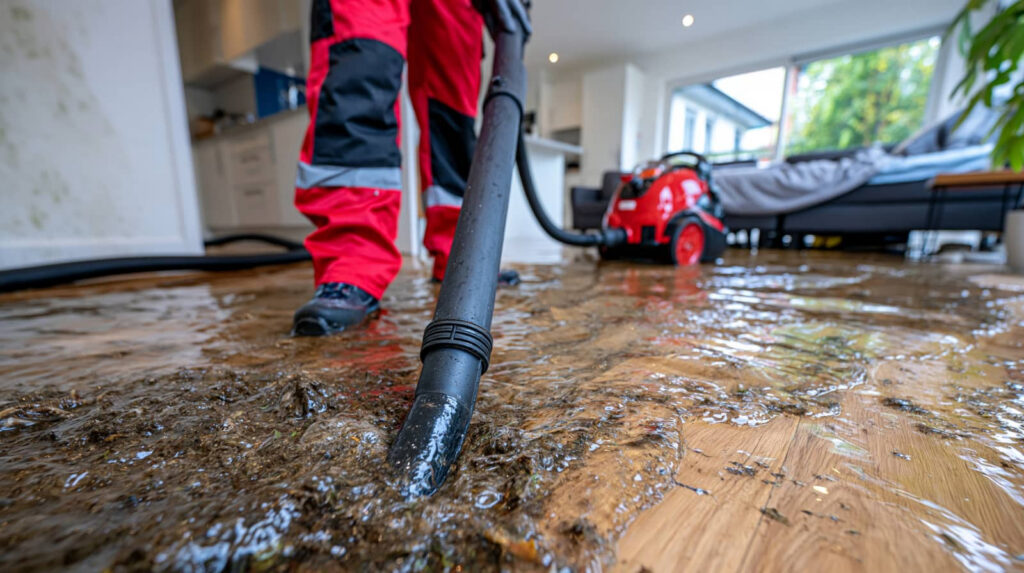
Next, technicians extract standing water with pumps and vacuums, then position air movers and dehumidifiers to dry hidden spaces.
They monitor readings daily to keep conditions on track and prevent secondary damage.
After drying, they clean and sanitize surfaces to reduce contamination and odors.
Throughout the process, you’re kept informed, so you know what’s happening and why.
With a coordinated team and clear steps, you can feel confident your property’s getting the care it needs to recover safely and completely.
Common Water Damage Repairs
Common repairs often start where moisture left the biggest mark: damaged drywall, warped flooring, stained insulation, and compromised trim.
You’ll typically replace saturated materials, patch openings, and refit finishes so your space feels solid again. If water reached framing or subflooring, your crew may sister boards, tighten fasteners, or install new underlayment to restore strength.
They’ll also clean affected surfaces, treat minor microbial growth, and verify that hidden cavities are dry before closing walls. In some cases, you’ll need cabinet, baseboard, or ceiling repair to bring the area back to normal.
These fixes aren’t just cosmetic; they help you reclaim a safe, comfortable home. With skilled restoration, you’re not rebuilding alone—you’re getting your property back on track, one precise repair at a time.
How to Prevent Future Water Damage
Preventing future water damage starts with staying ahead of small issues before they become major failures. Inspect plumbing, appliances, roofs, and seals on a routine schedule, and tighten or replace anything that shows wear.
Keep gutters clear so water drains away from your foundation, and extend downspouts at least several feet. Test sump pumps, install leak sensors near sinks and water heaters, and shut off the main supply when you leave for long periods.
In cold weather, insulate exposed pipes and maintain steady indoor temperatures. After storms, walk your property and check for pooling, staining, or damp odors.
When you act early, you protect your home and join the many owners who handle risks before they spread.
Frequently Asked Questions
How Long Does Water Damage Restoration Usually Take?
It usually takes 3-7 days for drying, but full water damage restoration can take 1-4 weeks. You’ll recover faster when you act quickly, because moisture, materials, and repairs all affect the timeline.
Does Homeowners Insurance Cover Water Damage Restoration Costs?
Usually, yes—your policy can be a lifeboat after a burst pipe or sudden leak. You’ll need to document damage, call your insurer fast, and confirm exclusions for flooding, neglect, or gradual seepage.
Can I Stay in My Home During Restoration?
You can sometimes stay home during restoration, but you’ll need to assess safety first. If the damage is minor, you’re often fine; if there’s mold, sewage, or structural risk, you should relocate temporarily.
How Do Professionals Detect Hidden Water Behind Walls?
Like a detective, you’ll see professionals use moisture meters, infrared cameras, and sometimes drill small inspection holes to find hidden water behind walls. They’ll map damp areas, confirm leaks, and guide drying to protect your home.
What Are Signs of Mold After Water Damage?
You’ll notice musty odors, visible black, green, or white spots, peeling paint, warped drywall, and allergy symptoms. Check damp areas fast, because mold grows quickly after leaks, and you can stop it early.
Conclusion
Water damage doesn’t wait for your calendar, your budget, or your “I’ll deal with it later” attitude. You’ve got to act fast: stop the water, document the damage, and get drying equipment on the job before mold turns your home into an uninvited science experiment. If you follow the restoration steps and stay ahead of leaks, you can protect your property, limit repairs, and keep your space safe, dry, and functional.